

Wiring Your Humbucker: From Mud to Magic
So, you’ve ditched the vintage-style braided wire for a 4-conductor lead. Good shout. While the old-school stuff looks “proper,” 4-conductor wiring is where the real fun begins. It’s the difference between having one sound and having a whole Swiss Army knife of tones at your fingertips.
Mojo Pickups Colours [HERE]
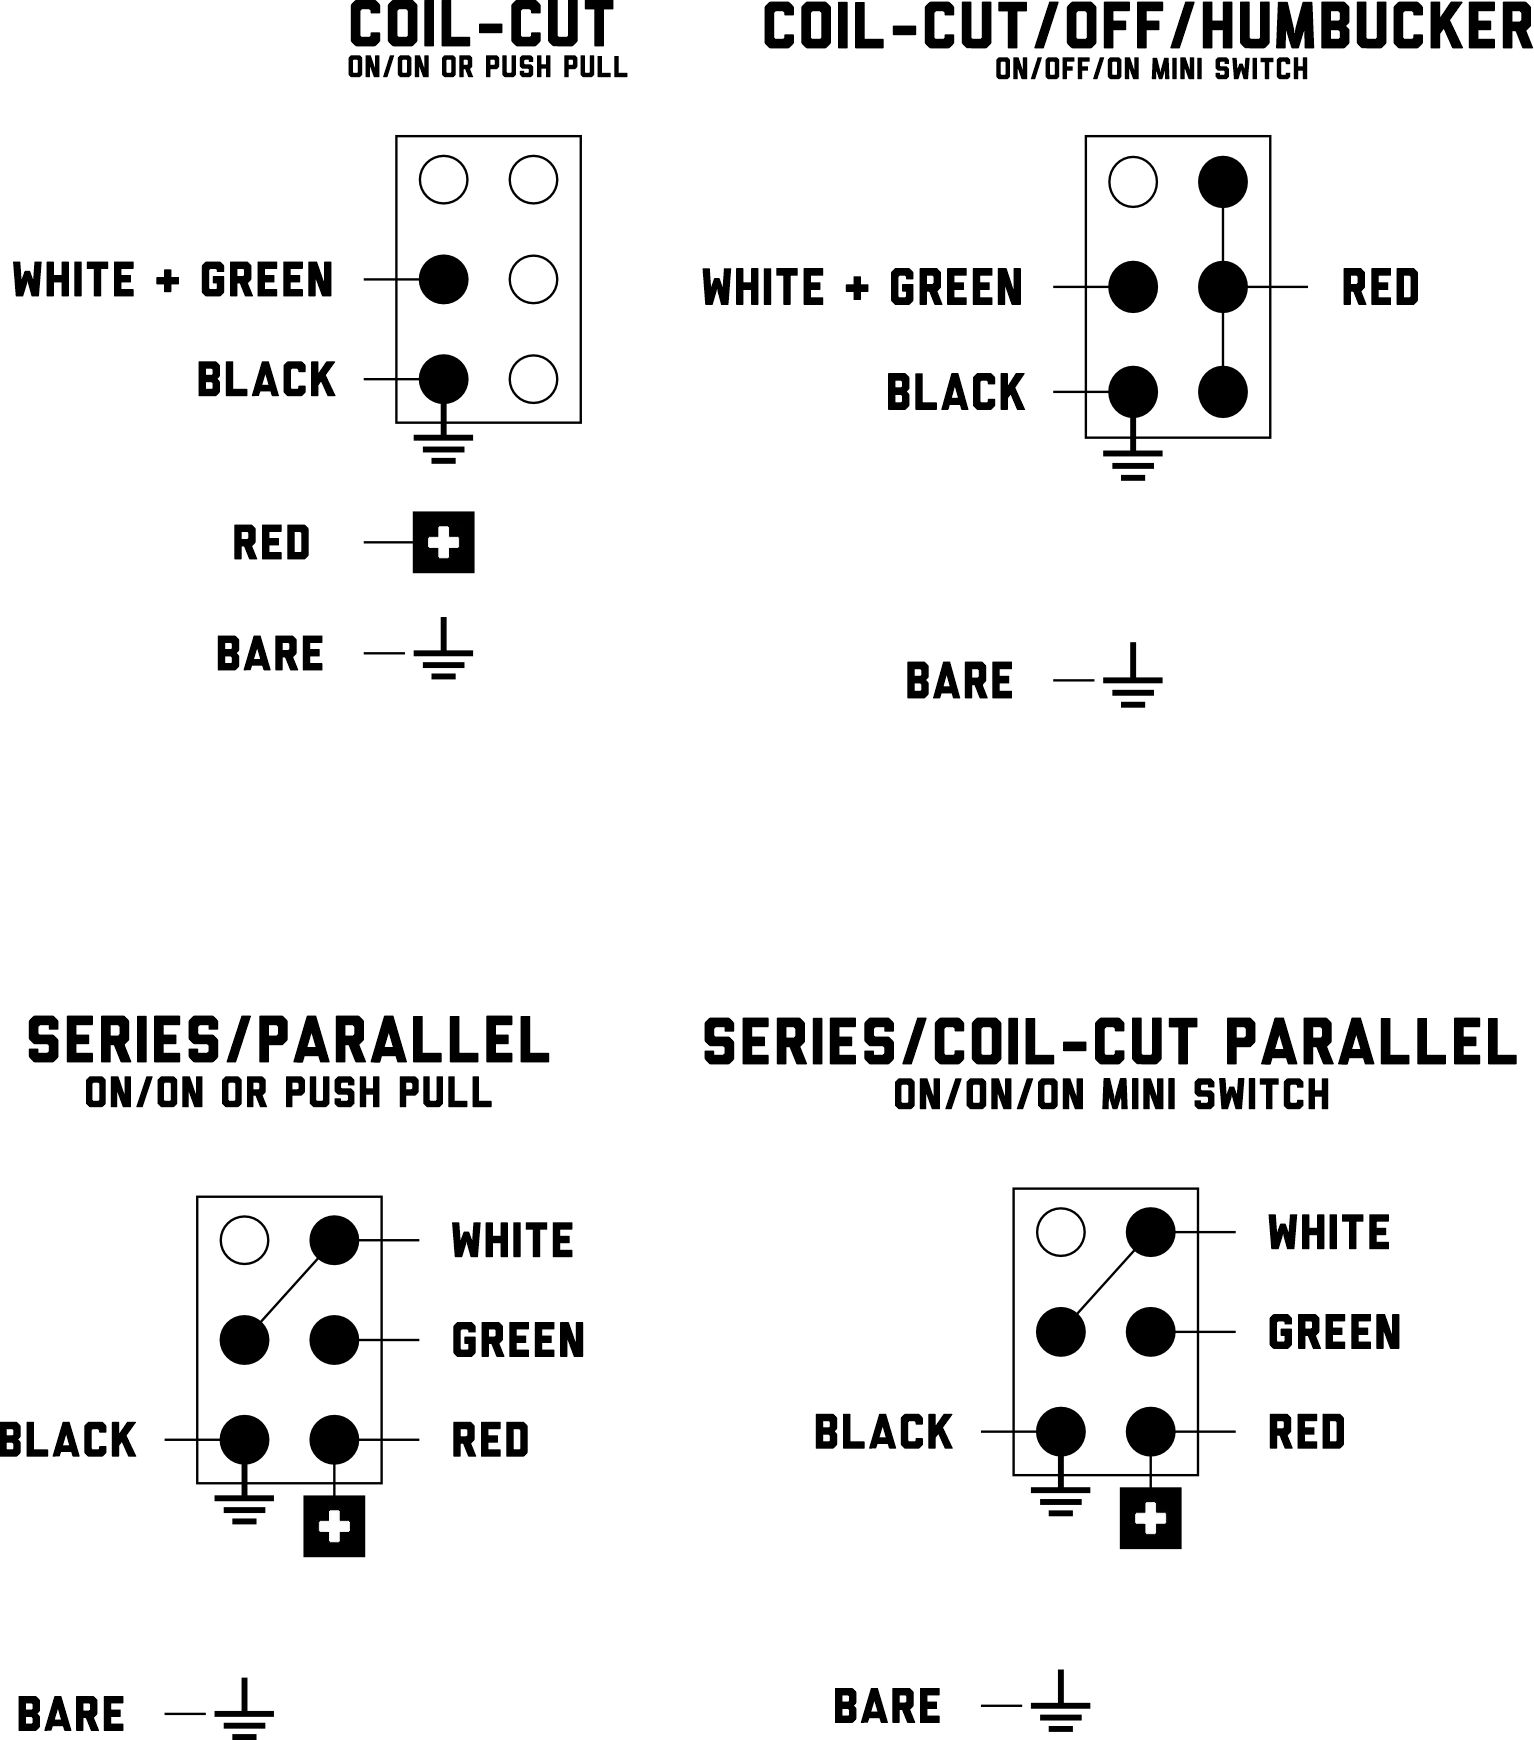
The Colour Code Breakdown
Before we heat up the soldering iron, let’s identify what we’re working with.
1. The “Standard” Beefy Tone (Series)
This is the classic humbucker sound: thick, loud, and hum-free. You are connecting the two coils end-to-end to create one giant circuit.
-
Hot Signal: Solder the Red wire to your selector switch or the left lug of your volume pot.
-
The “Series Link”: Solder the White and Green wires together, wrap them in heat-shrink tubing or electrical tape, and tuck them away. They don’t touch anything else.
-
Earth (Ground): Solder the Black and Bare wires together to the back of the volume pot.
2. The “Skinny” Tone (Coil Splitting)
Want that glassy, single-coil chime? Coil splitting “kills” one coil by sending the signal to ground before it can finish its journey. You’ll need a Push/Pull pot or a toggle switch for this.
-
Hot Signal: Red to the switch.
-
The Split: Solder the White and Green wires to the middle lug of your Push/Pull switch.
-
The Ground: Solder the bottom lug of that switch to the back of the pot.
-
Result: When you pull the knob, it shorts the South coil to ground, leaving only the North coil active.
3. The “Hi-Fi” Tone (Parallel)
Parallel wiring is the “underrated gem.” You get a brighter, lower-output sound similar to a single coil, but it stays hum-cancelling.
-
Hot Side: Solder Red and Green together to your “Hot” input (switch).
-
Ground Side: Solder Black, White, and Bare together to the back of the pot.
-
The Vibe: It’s sparkly, clean, and doesn’t have the volume drop of a standard split.
Pro Tips for a Tidy Loom
-
Tin Your Tips: Always “tin” (apply a bit of solder to) the wire ends and the pot lugs before you try to join them. It makes for a much stronger, shinier joint.
-
Watch the Heat: Pots are tough, but if you hold the iron on them for 30 seconds, you’ll fry the internal components. Get in, get out.
-
The Bare Wire: Never let the Bare wire touch a “Hot” connection. It’s there to shield the guitar from interference; if it touches the switch output, you’ll get a whole lot of silence.
The Golden Rule: Every manufacturer uses different colours. Since you’re using Red as North Start, this guide is spot on. If you ever swap to a different brand (like Dimarzio or Gibson), the colours will change, but the logic stays the same.